Saturday, October 30, 2010

Find Your Favorite Recipes Easier!!!

We're excited to announce some new features on Near to Nothing!!  In addition to the topics list, the search feature, and the archive, you can now find your favorite recipes through our recipe indices.  This gives you five ways to locate recipes.  Here's a quick run-down:

1.  Topics:  On the right side of the page, there is a square that lists topics.  The larger the word, the more posts there are in that topic.  They are listed in order from most posts to least posts, thus they are not listed alphabetically.  Want to find freezable recipes or dishes that contain chicken?  Use this feature.


2.  Search:  Also on the right side of the page, under the blog archive, you will find a search box.  Enter any word or phrase in here and it will bring up a list of posts that contain that word or phrase.


3.  Archive:  Don't really know what you're looking for?  Browsing for some inspiration?  Check out the blog archive on the right side, just under "About the Authors."  This lists all posts in the order they were posted.  This is the best way to find seasonal recipes (once we've been around more than a year).


4.  Recipe Index--Alphabetical:  You can get to this list by clicking on the tab at the top of the page.  This lists all recipes alphabetically for easy access.  Just click on the name of the recipe you want!


5.  Recipe Index by Category:  The tab for this list is also located at the top of the page.  This list makes it easy to find recipes for main dishes, desserts, soups, side dishes, etc.


We hope these additional features will make Near to Nothing more user-friendly.  Linking all posts up to this point was a daunting task.  Please let us know if there are any broken links.  And if you have any additional ideas about how we can make Near to Nothing easier to use, please don't hesitate to speak up by leaving a comment here or e-mailing us at kitchendiaries [at] yahoo [dot] com!

Friday, October 29, 2010

Roasted Pumpkin Seeds

As a kid, when we carved pumpkins, our dad would take the seeds and roast them.  This year, I bought my first pumpkin since I've been married; and I couldn't let those delicious little seeds inside go to waste, so I hopped online and started researching different methods of roasting pumpkin seeds.  After I kind of figured out what I wanted to do, I scraped the seeds out of my pumpkin, washed them, and had them drying when my dad called.  I told him what I was doing, and he told me he had the best pumpkin seed recipe.  So I tried his method, and I was quite pleased with the results.


Roasted Pumpkin Seeds
Seeds from 1 pumpkin (1 to 1 1/2 cups)
1 Tbsp. butter, melted
Salt, to taste

Preheat your oven to 300 degrees.


Clean the pumpkin off the seeds.  Dry them as well as you can with a paper towel.  The seeds will stick to the paper towel, so just brush them off.  Lay them in a single layer on a baking sheet and place in oven for about 5 minutes, stirring halfway through.  This is simply to thoroughly dry them off, not to roast them.  Once they're dry, take them out of the oven and toss them with the butter and salt.


Place them back onto the baking sheet and spread the seeds into a single layer.  Roast in the oven for 30 to 40 minutes, or until at least half of most of the seeds are browned (they will start browning from the pointy end of the seed and the other half will still be white).  Remove from the oven and let cool.


And here's a bonus of picture of the pumpkins our amazingly talented dad carved of the grandkids last year!  Check back next week for this year's carvings!  Also, if you're interested in what I used my pumpkin for, be watching in the next couple of weeks and I'll tell you!

Wednesday, October 27, 2010

Halloween Slime Soup (Split Pea Soup)


This year my six-year-old daughter decided she wanted to host a Halloween party for my parents.  The menu?  Pumpkin pizza and split pea slime soup.  (That’s pizza that looks like a Jack-o-lantern; not that contains pumpkin.)

I must admit that I wasn’t a huge fan of split pea soup until recent years.  After all, it looks like slime.  But it has become one of my favorite soups to make in the winter.  It is cheap, variable, freezable, and delicious, not to mention nutritious.

The following recipe is a meatless version that can be made vegan by substituting vegetable bouillon for the chicken bouillon.  Perhaps in the somewhat near future I will post about how to make this soup with a ham bone.

Halloween Slime Soup (Split Pea Soup)
1 lb. green split peas
1 carrot, sliced
1 rib celery, sliced
½ medium onion, chopped
8 c. water, plus more to adjust consistency
2 bay leaves
½ tsp. dried thyme
1 tsp. garlic powder
¼ c. chicken or vegetable bouillon
Salt and pepper, to taste
Sour cream (optional)

From the bulk bins at WinCo of course.
Because the soup will be pureed,
the vegetables do not have to
be uniformly cut.


Place peas, carrot, celery, onion, water, bay leaves, thyme, garlic powder, and bouillon in large pot.  Bring to boil.  Reduce heat and simmer until peas turn to mush and carrots are soft, about 45 minutes, adding water as necessary if there is a lot of evaporation.  Remove from heat.  Remove and discard bay leaves.  PureĆ© with immersion blender.  Adjust consistency by adding water or simmering water out; add salt and pepper to taste.  Serve with sour cream, if desired.  Yield:  about 2 qts.  Total cost:  about $2!!

The peas will turn to mush even
before being pureed.


Monday, October 25, 2010

Homemade Cookie Cutters


Last month, I wrote about the fish cookie cutter I made for my daughter's birthday.  It was pretty easy to make and very inexpensive since I already had all the materials on hand.  In order to make your own cookie cutter you will need a pair of scissors, a stapler, and a disposable aluminum casserole dish, cake pan, loaf pan, or any other disposable aluminum dish.

I started by drawing the shape I wanted on a piece of paper.  Once it was drawn, I cut it out then took a string and laid it along the edges of the cutout shape.  My purpose here was to measure how much aluminum I would need and to make sure I had a big enough pan.  The cookies I was making were small, so I was able to use an old disposable aluminum loaf pan. When doing this step, it is important to plan for a little extra aluminum because you will be overlapping the ends a bit.  I cut the bottom out of the pan, then cut a thin strip - maybe an inch-and-a-half wide or so.  Once I had the strip cut, I made a small fold along both of the long edges to prevent cutting myself on the sharp edges.  I then began to carefully shape the metal strip around the paper shape I had cut out.  It took a bit of working with the metal to get it to the shape I wanted, but with a bit of patience and persistence, I successfully had a goldfish-shaped cookie cutter!  When you're cutting your cookies, gently press the cutter into the dough so it doesn't bend.

The strip cut out of the bottom of the loaf pan.
The edges folded down to prevent cuts.
Beginning to shape the metal around the paper cutout.
Once the metal is shaped, overlap the ends and close with a staple.
The finished product!
Keep in mind that only one side of the cookie cutter needs to be the exact shape you're looking for.  Because the aluminum is so flimsy, it was difficult to properly shape both sides.  As long as the other side was fine, I didn't mind that this one was a little off.  I simply used the good side for my cookies.
These aren't the most sturdy or long-lasting cookie cutters because the metal they're made with is so flimsy.  If you'd like a more sturdy cookie cutter, you can use metal ribbon and follow the instructions here

Next week we'll talk about different ways to decorate sugar cookies, as well as give icing recipes!

Friday, October 22, 2010

Leftover Spaghetti Sauce Minestrone


As our two freezer weeks come to an end, I thought I’d finish with a recipe that comes out of the freezer rather than goes into the freezer.  Back in July I wrote about making a big pot of spaghetti sauce and freezing the leftovers.  I then wrote about turning some of that leftover spaghetti sauce into chili.  But that’s not all you can do with it!  Just a few simple additions and you have minestrone!

I froze 1 quart, knowing I would
want to use it for minestrone.
The beans also came out of my
freezer.  I decided not to rinse
them and let the bean juice
add to the flavor of the
minestrone.


Minestrone is one of those soups that really has no recipe.  It contains whatever vegetables are in season or on hand and may or may not contain meat or a starch (rice or pasta).  Different regions of Italy have different variations of minestrone as well as does each Italian cook.  Because this version of minestrone has meat, vegetables, and a starch, it can be served as an entrĆ©e soup.  It goes great with a slice of crusty bread and a side salad.

Leftover Spaghetti Sauce Minestrone
1 qt. water
6 tsp. beef bouillon
½ c. elbow macaroni
1 qt. leftover spaghetti sauce, thawed
1 c. frozen peas
1 c. kidney beans
Parmesan cheese (optional)


In large pan, bring water and bouillon to boil.  Add macaroni and cook just until al dente.   Turn heat down to medium.  Add spaghetti sauce, peas, and kidney beans.  Heat through.  Serve topped with Parmesan cheese if desired.


Wednesday, October 20, 2010

Chicken Pasta


This is one of my favorite pasta dishes and I have to thank my sister-in-law, Michelle, for the recipe!  I love it, and since there are only 2 1/2 of us eating in our house, I am usually able to freeze half of it for a future meal.  If you're really trying to plan ahead and freeze a lot of meals, just double or triple the recipe and you'll get even more!

This recipe calls for canned Italian tomatoes.  I rarely buy canned tomatoes, but when I do, I stock up.  I wait for them to go on sale, but not just any sale.  It has to be an amazing sale.  I can usually sweeten the deal by adding coupons on top of the sales savings.  By doing this, I hardly ever have to pay full price for them!


Chicken Pasta
3-4 garlic cloves, minced
1/2 cup each: chopped onion, green bell pepper, red bell pepper*
1/3 cup chopped celery
1 Tbsp olive oil
1 can (14.5 oz) Italian diced tomatoes
1 1/2 cups water
1 1/2 tsp chicken bouillon (or use a 14.5 oz can of chicken broth and omit the water)
2/3 cup sliced fresh mushrooms
1 tsp dried basil
2 bay leaves
1/4 tsp pepper
1 tsp Italian seasoning
1/4 cup Parmesan cheese
12 oz spiral pasta
2 cups boneless, skinless chicken breasts, cooked and cubed

*I like lots of veggies in mine, so I usually end up putting in at least 3/4 cup of each one.
 In a skillet, saute onions, peppers, celery, and garlic in oil until tender.  Stir in tomatoes, water, bouillon, mushrooms, and seasonings.  Bring to a boil; cover, reduce heat, and simmer for 15-20 minutes. In the meantime, cook pasta according to package directions and drain.  Add chicken and Parmesan cheese to the tomato mixture.  Discard bay leaves.  Serve sauce over noodles.
 Note: This sauce is quite thin, which I don't mind.  However, if you want to thicken it up a bit, you can add a little tomato sauce (I added a 4 to 5 tablespoons to mine) or maybe even try tomato paste (I haven't tried it and therefore don't know how it would affect the flavor).  Additionally, I should have specified that it's only the sauce that's freezable.  You'll want to make fresh noodles each time!

Monday, October 18, 2010

Lentil Soup


When spring comes and warm weather arrives, I get excited because I can make delicious dinner salads.  But when fall comes and the price of fresh salad ingredients goes up, I don’t mind a bit because I can start making soup!!

Many of the soups I make call for onions, carrots, and/or celery.  These vegetables are usually very reasonably priced all year.  Add some dried lentils and chicken broth and you’ve got a super tasty soup that costs less than $1 per quart.  And continuing last week’s theme, it’s freezable!!


Yesterday we had some friends over for lunch after church.  I made it real easy on myself.  Two or three days before, I took two containers of lentil soup out of my freezer and put them in the fridge to thaw.  Before church, I just dumped them in the crock pot and left it to heat while we were gone.  We came home to piping hot lentil soup and a house that smelled delicious.  I served the soup over white rice, though it is excellent by itself.

Before pureeing 
Lentil Soup
2 Tbsp. vegetable oil
1 large onion, chopped
2 large carrots, chopped
2 large celery ribs, chopped
1 Tbsp. salt
2 lbs. brown lentils
2 large tomatoes, chopped (can be peeled if desired)
4 qts. water
¼ c. + 2 Tbsp. chicken bouillon
1 Tbsp. ground cumin
3 bay leaves

Heat vegetable oil in large stock pot over medium heat.  Add onion, carrots, celery, and salt; sautĆ© until tender but not soft.  Add remaining ingredients, turn heat to high, and bring to a boil.  Reduce heat and simmer 40-45 minutes, or until lentils are soft.  Remove from heat.  Discard bay leaves.  Using an immersion blender, purĆ©e to desired consistency.  Yield:  5 qts. (2 lb., 5 oz.).  Total cost:  less than $5.00!


Friday, October 15, 2010

Chimichangas


My family loves Mexican food, and I love to make it because it can be very inexpensive.  One of the reasons it is so inexpensive is because beans and rice easily fit into Mexican meals and make great fillers, meaning less of the expensive stuff - meat!

Throughout high school, frozen chimichangas were a staple in many of my fellow students' diets.  I even partook of one occasionally.  However, store-bought frozen meals don't fit in my budget nor are they (usually) healthy.  Thankfully, I'm able to make a healthy version at home, and the best part is it's freezable!

Chimichangas
1 Tbsp. butter
1 lb. boneless skinless chicken breasts, chopped
Salt, pepper, cumin, chili powder, and garlic powder, to taste
1/2 onion, chopped
4 oz. diced green chilies
Refried beans
Green onions
16 oz. can enchilada sauce (or see recipe below)
Cheddar or Jack cheese
Tortillas

Melt butter in a skillet over medium-high heat.  Add chicken and spices; cook chicken thoroughly.  Remove from heat and set aside.


In the same skillet, saute the onions until tender.  Add diced chilies with juice; heat thoroughly.  Add prepared chicken and enough enchilada sauce so that chicken mixture is saucy, but not soupy.  Stir to combine.

Heat tortillas for a few seconds in the microwave so they are pliable and easy to work with.  On each tortilla, place a strip of refried beans, chicken mixture, enchilada sauce, green onions, and cheese.  Place them a little off-centered for easier folding.  Fold the ends of the chimichanga in toward the center, then roll the other two ends over the filling.


Place in a greased 9x13 pan.  Spray the folded chimichangas with cooking spray (this takes the place of deep frying, creating a crispy outside without the added fat of deep frying).  Bake in a preheated 500 degree oven for 8 to 10 minutes or until the chimichangas are golden brown and crispy.  At this point, you can eat them or you can let them cool completely, wrap them individually in parchment paper, then place them in a zip-top bag, and put them in the freezer.  When you're ready to eat them, just pull them out of the freezer and stick one in the microwave for about 2 minutes, or until it is heated through.  Time will need to be adjusted if you're reheating more than one at a time.


Enchilada Sauce
2 Tbsp olive oil
3 Tbsp flour
1/4 cup chili powder
2 cups water
16 oz. tomato sauce
Salt, to taste
Garlic powder, to taste

In a saucepan, heat olive oil over medium heat.  Add flour and cook, stirring, 1 minute.  Add chili powder and cook an additional minute.  Whisk in water and tomato sauce.  Add desired amount of salt and garlic powder.  I think I only ended up using about half of the enchilada sauce, so I stuck the rest in the freezer for another batch of chimichangas at a later date!

Wednesday, October 13, 2010

Manicotti, Lasagna, and Stuffed Shells


When I go to the grocery store, I always have a list and try not to deviate from it too much.  Of course, there are times when I remember that we need something I have neglected to put on my list.  But I do not buy impulsively.  Rash and unplanned grocery shopping leads to less healthy meals, higher grocery bills, more food wasted, and a more stressful shopping experience.

That being said, there are times when it is prudent to make a change in the game plan part-way through your shopping trip.  A few weeks ago I was at WinCo, list in hand.  I noticed that Prego marinara sauce (yes, I sometimes use jarred spaghetti sauce) and cottage cheese were on sale.  The savings were too good to pass up; so I grabbed a tub of cottage cheese and a few jars of Prego, then backtracked a bit, and picked up some manicotti noodles.


Manicotti is one of Robbie’s absolute favorite meals—that’s what he chose for his birthday dinner this year.  I rarely make it, however, because it isn’t the healthiest pasta dish and all the cheese makes it one of the more costly meals that I make.  So when I saw some of the ingredients at a great price, I just had to insert it in my menu for this week!

I have to break my spending limit of $1/lb. for pasta when I make manicotti.  I have never been able to find manicotti noodles at that price.  You might notice that your grocer’s pasta aisle now has “oven ready” manicotti and lasagna noodles—“No Boiling Required.”  I’ve been making these types of baked pastas for years with regular noodles, and I never boil them.  There is no need to pay more money for these special noodles.  They key is to make sure the sauce is liquidy enough to cook the noodles in the oven and to bake it a little longer than if you had boiled the noodles.  Not only does this save on active prep time, but the noodles don’t rip while you are filling them.  Jumbo shell noodles have to be boiled because the sides overlap too much to fill.  Just follow the directions on the package.  They should be undercooked, just enough to make them pliable.  They will continue to cook in the oven.

I use cottage cheese rather than the traditional ricotta cheese because it is cheaper but still produces a great filling.  I also think the milder flavor of cottage cheese is more popular with children.  Don't be afraid to try this recipe if you or someone in your family does not like cottage cheese.  Neither of our husbands like cottage cheese, but both of them like manicotti.

An added bonus to this recipe is that it is freezable!  Since the ingredients were on sale, I bought enough to make two batches of filling.  I prepared both batches at the same time—one pan of manicotti to eat and two little pans of lasagna to freeze.  Both pastas can be frozen either before or after baking.  Freezing it after it is baked reduces prep time when you are ready to eat it but produces a slightly over-baked pasta.  You can compromise and bake it half-way before freezing it.  I prefer to freeze it unbaked.  I just move it from the freezer to the fridge one or two days before I’m ready to bake it.  However you decide to do it, be sure to wrap it well to prevent freezer burn.  I usually wrap it with two layers of plastic wrap and then a layer of foil (be sure to remove the plastic wrap before placing it in the oven).

Manicotti or Cheese Lasagna
1 lb. cottage or ricotta cheese
1 c. shredded mozzarella cheese
½ c. shredded Parmesan cheese
2 eggs
Dash each garlic powder, basil, oregano, thyme, and marjoram
1 pkg. manicotti or lasagna noodles, uncooked
1 jar spaghetti sauce
Mozzarella cheese, for sprinkling
Parmesan cheese, for sprinkling


Preheat oven to 350° (325° if using a clear baking dish).  In medium bowl, combine cottage or ricotta cheese, mozzarella cheese, and Parmesan cheese.  Mix in eggs and herbs to taste.  Pour a thin layer of spaghetti sauce in bottom of 9”x13” baking dish.  Continue following directions for specific pastas below.

Manicotti
Use a fork to stuff each noodle with filling; arrange in single layer in dish.  Cover with remaining spaghetti sauce.  Cover tightly with foil; bake 1 hour.  Remove foil and sprinkle top with mozzarella and parmesan cheeses.  Continue baking, uncovered, until cheese is melted and starts to brown, about 5-10 minutes.  Feeds:  6-8.  Total cost:  less than $8.00 with items on sale.


Lasagna
Alternate layers of sauce, noodles, and cheese.  Finish with a layer of noodles then sauce.  Cover tightly with foil; bake 1 hour.  Remove foil and sprinkle top with mozzarella and parmesan cheeses.  Continue baking, uncovered, until cheese is melted and starts to brown, about 5-10 minutes.


These little disposable pans are great
for giving meals away.  I get them at
Cash and Carry Warehouse.  You can
find other stores here.
The lids are perfect for writing
contents and cooking directions.
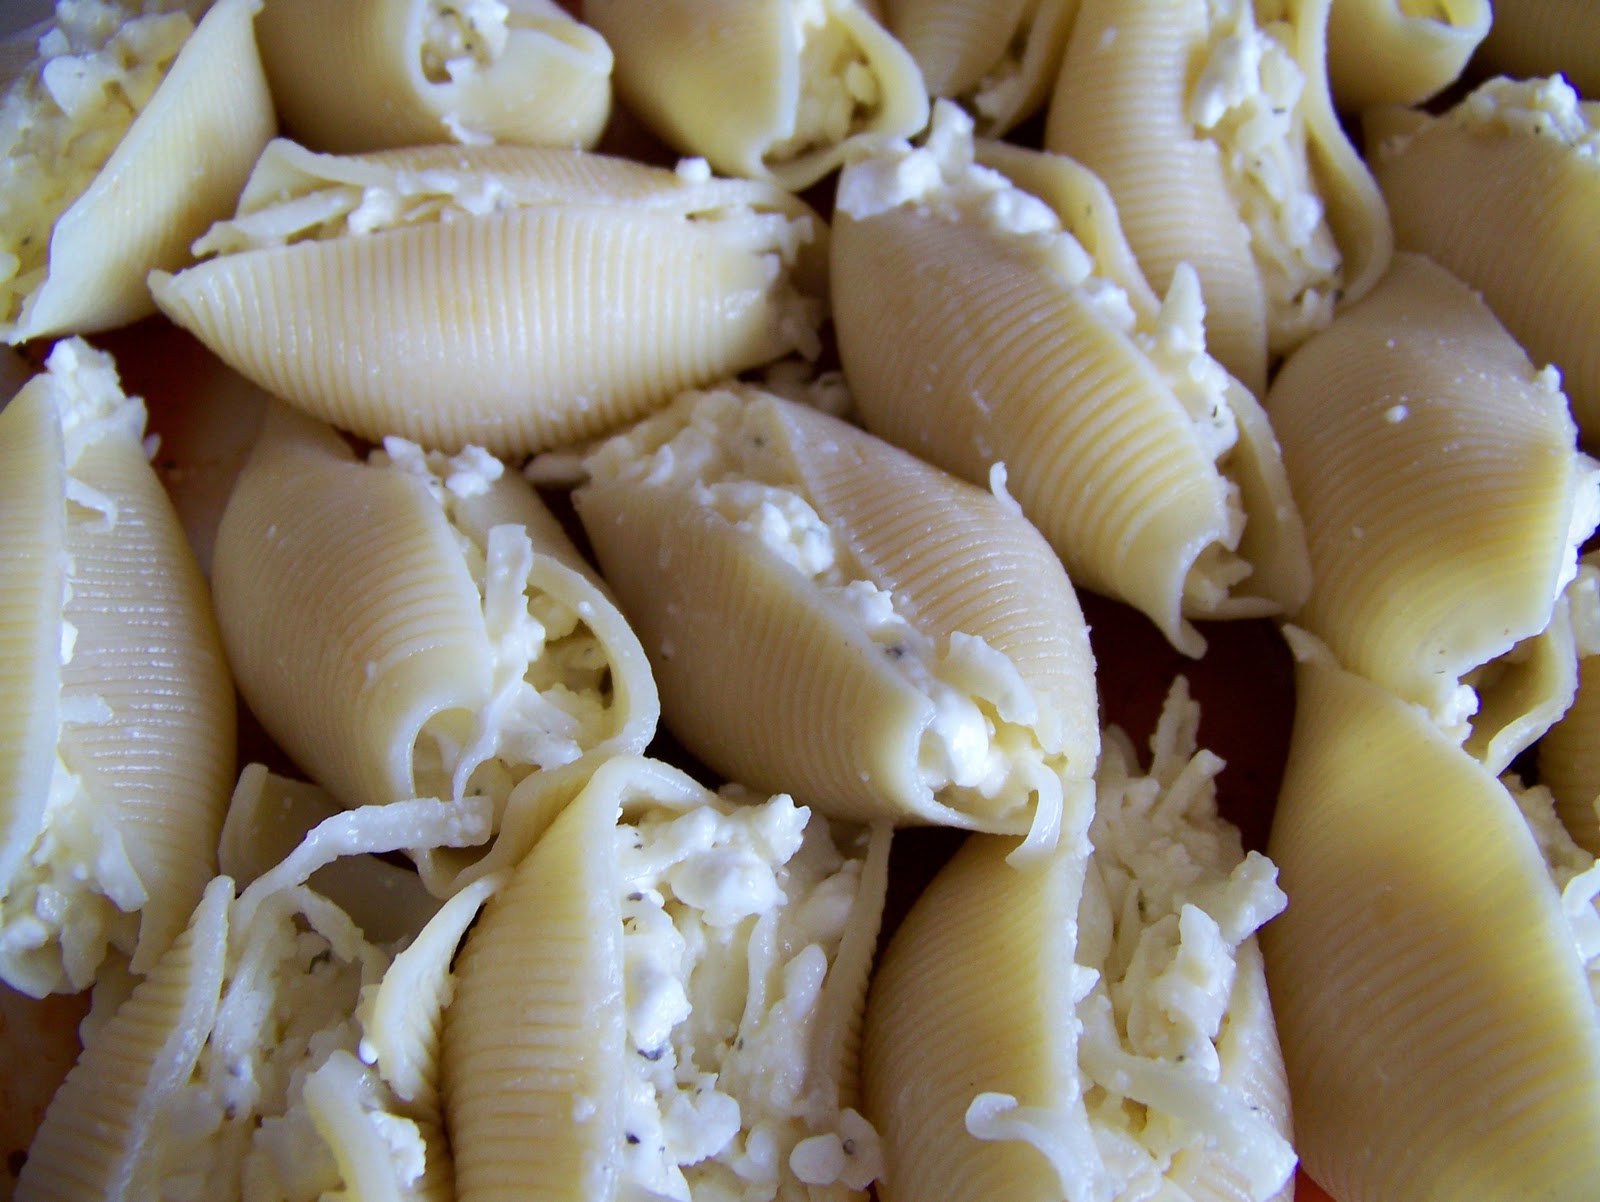


Stuffed Shells
Prepare 1½ batches of filling:
1½ lb. cottage or ricotta cheese
1½ c. shredded mozzarella cheese
¾ c. shredded Parmesan cheese
3 eggs
Dash each garlic powder, basil, oregano, thyme, and marjoram
1 pkg. jumbo shell noodles, cooked according to package directions
1 jar spaghetti sauce
Mozzarella cheese, for sprinkling
Parmesan cheese, for sprinkling

Preheat oven to 350° (325° if using a clear baking dish).  In medium bowl, combine cottage or ricotta cheese, mozzarella cheese, and Parmesan cheese.  Mix in eggs and herbs to taste.  Pour a thin layer of spaghetti sauce in bottom of 9”x13” baking dish.  Fill each shell with a spoonful of filling.  Arrange in single layer in dish.  Tear up any remaining noodles and place in holes.  Cover with remaining spaghetti sauce.  Cover tightly with foil; bake 1 hour.  Remove foil and sprinkle top with mozzarella and parmesan cheeses.  Continue baking, uncovered, until cheese is melted and starts to brown, about 5-10 minutes.

Boiled and filled
Before they are boiled.


This one hasn't been baked yet.  It's in my freezer for dinner
later this week!!

Related Posts with Thumbnails